Timing Belt Tension Calibration: Foundations of Synchronization Accuracy
Step-by-step tension setting procedures for optimal engine timing belt synchronization
Getting the tension right on the belt is really important because it stops those annoying issues where the timing gets off track or teeth skip over each other. Start things off by turning the crankshaft until the timing marks line up at what mechanics call TDC, which stands for Top Dead Center. Now comes the tricky part: loosen that tensioner lock bolt but keep about 40 to 50 Newtons worth of gentle pressure applied along the longest stretch of the belt using one of those special tension gauges designed for this job. The belt should sag around 5 to 7 millimeters when measured halfway between the pulleys for most engine types. Keep holding that pressure steady while tightening down the lock bolt to somewhere between 25 and 30 Newton meters of torque. After everything feels secure, give the whole engine a good spin through two complete revolutions by hand before checking again how much the belt deflects. If there's more than a 10 percent difference compared to earlier readings, adjustments will need to happen. Doing all this properly helps eliminate those pesky vibrations that can lead to tiny slippages when the engine runs at higher speeds.
Automatic tensioner operation, torque specs, travel limits, and early failure indicators
Self adjusting tensioners keep belts properly tensioned using either springs or hydraulic systems, though proper installation remains absolutely critical. For hydraulic models specifically, they need to be completely compressed prior to putting them in place according to what the manufacturer says. The mounting bolts aren't just any bolts either they have to be tightened to exactly 20 to 25 Newton meters of torque otherwise bearings might get out of alignment and components could wear down much faster than normal. Keep an eye on that little indicator on the side of the tensioner device. When that needle moves past about three quarters of its total movement range, it means the belt has stretched too far for safe operation and needs replacing right away. Signs something's going wrong usually show up as...
- Chirping noises during cold starts
- Visible oil seepage from hydraulic units
- Asymmetric or scalloped pulley wear
- Resonance vibrations in the 2,000–3,000 RPM band
These symptoms typically appear 500–800 miles before synchronization loss, enabling timely intervention.
Precision Installation: Tools, Alignment, and Load-Verified Timing Marks
Essential precision tools—camshaft locking kits, crankshaft pins, and angular drift prevention
When installing timing belts, camshaft locking kits and crankshaft pins aren't just helpful—they're absolutely essential. These tools stop the rotating parts from moving around while aligning everything properly. Without them, there's something called angular drift where the camshafts actually rotate slightly under belt tension. And trust me, even a tiny 2 degree mistake can lead to serious damage when valves hit pistons in those interference engine designs. Getting the torque right matters too. Most factory specs call for around 15 to 20 Newton meters on cam sprockets. Use a properly calibrated torque wrench to avoid stripping those delicate aluminum components. Shop mechanics know this stuff well because they've seen what happens when tools aren't checked regularly. Monthly calibration checks with certified testers are worth the time since improperly set tools can throw off tension measurements by as much as 30%. That kind of error margin is asking for trouble down the road.
Beyond visual alignment: verifying timing marks under simulated load for true synchronization
Just looking at how things line up visually won't tell us if everything is actually working together properly. Engine parts move around when they get hot from running and all that pressure inside during combustion. To really know what's going on, we need to check those timing marks while the engine is under actual compression stress. This means using something called a barring tool to simulate real conditions. What this process uncovers are problems that regular eye checks simply don't catch. We're talking about misalignments sometimes as bad as four teeth off track in interference engines. These kinds of issues can cause serious damage down the road if left unchecked.
- Rotating the crankshaft against compression resistance
- Measuring cam/crank sprocket alignment under 90–120 psi simulated load
- Rejecting installations where mark deviation exceeds 0.5 mm
Field data shows engines verified under load experience 68% fewer timing-related failures within the first 50,000 miles. This protocol is especially vital for turbocharged and high-revving engines, where thermal growth compounds alignment error.
Timing Belt Material and Design Integrity Under Real-World Operating Conditions
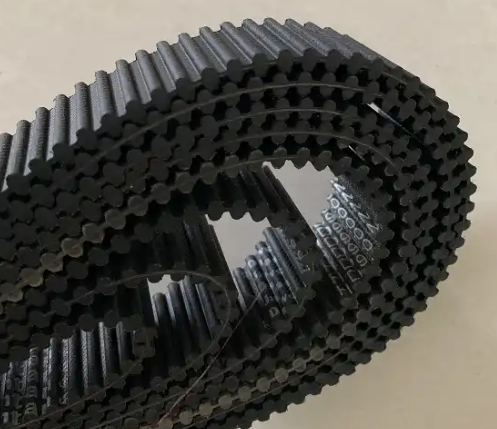
Tooth profile accuracy: HTD vs. GT2 belt geometry impact on high-RPM timing belt performance
The shape of belt teeth plays a big role in how well components stay synchronized when engines run at high speeds. HTD belts have those triangular shaped teeth which work great for static torque but start causing problems once RPMs go past 6,000. They create extra stress points that lead to more vibration and timing issues over time. GT2 belts take a different approach with their curved tooth design. These distribute the load much better across where the belt contacts the pulley, cutting down on backlash by around 40% at 8,000 RPM according to SAE International research from 2023. This makes all the difference for keeping the camshaft and crankshaft properly aligned during hard acceleration periods, something critical for engines with turbochargers or superchargers. Most major car manufacturers now specify GT2 profiles for engines running above 7,500 RPM because even a tiny half degree of timing drift can noticeably cut power output in these high performance applications.
Thermal stability of EPDM and HNBR compounds near exhaust manifolds (120°C+)
EPDM, or ethylene propylene diene monomer, can handle brief contact with temperatures around 150 degrees Celsius. However, it starts to permanently harden after sitting at just 130 degrees for about 200 hours - something we often see happening near exhaust manifolds. On the other hand, HNBR, which stands for hydrogenated nitrile butadiene rubber, holds onto about 90% of its tensile strength even after spending 1,000 hours at those same 150 degree temps. This means it doesn't become brittle and crack like EPDM does, which helps maintain proper synchronization. Tests show HNBR belts stay flexible three times longer than their EPDM counterparts when exposed to high heat under the hood. This matters a lot during stop-and-go driving conditions where engine compartment temperatures regularly climb above 120 degrees. With today's engines packed so tightly against exhaust parts, typically within two inches clearance, HNBR has pretty much become the go-to material choice for anyone concerned about belt longevity and keeping timing systems intact over time.
Preventing Timing Belt Failure Modes: Skipping, Stretch, and Synchronization Loss
When timing belts fail, they often do so through tooth skipping, stretching over time, or complete loss of synchronization between components. Most of these problems can actually be prevented if we address three main issues upfront: getting the tension right, managing heat damage, and fixing any alignment problems. If the belt isn't tight enough, it starts vibrating and jumping teeth when shifting gears quickly. On the flip side, making it too tight speeds up wear on EPDM materials, sometimes stretching them past their design limits by about 3%. Heat is another big problem. Prolonged exposure to temperatures over 120 degrees Celsius really breaks down HNBR compounds, cutting tensile strength roughly in half after around 15,000 hours of operation. To avoid all this trouble, mechanics should check timing marks carefully when installing new belts and keep an eye on tensioner movement every three months or so. Replacing belts before they reach 60,000 miles helps prevent those nasty piston valve collisions in interference engines, which nobody wants to deal with.
FAQ Section
Why is timing belt tension important?
Proper tension prevents issues like timing getting off track or teeth skipping, ensuring smooth engine operation.
What are signs of tensioner failure?
Indicators include chirping noises during cold starts, visible oil seepage from hydraulic units, asymmetric or scalloped pulley wear, and resonance vibrations in the 2,000–3,000 RPM band.
Why use GT2 belts over HTD belts for high RPM engines?
GT2 belts distribute load more evenly with their curved tooth design, reducing backlash and timing issues at high RPMs, unlike HTD belts.
How does temperature affect timing belt materials like EPDM and HNBR?
EPDM hardens permanently at high temperatures, while HNBR retains flexibility and tensile strength, making it a preferred material for hot conditions.
How can timing belt failure be prevented?
Prevent failure by ensuring correct belt tension, managing heat damage, and fixing any alignment issues; also, monitor tensioner movement and replace belts timely.
Table of Contents
- Timing Belt Tension Calibration: Foundations of Synchronization Accuracy
- Precision Installation: Tools, Alignment, and Load-Verified Timing Marks
- Timing Belt Material and Design Integrity Under Real-World Operating Conditions
- Preventing Timing Belt Failure Modes: Skipping, Stretch, and Synchronization Loss
- FAQ Section